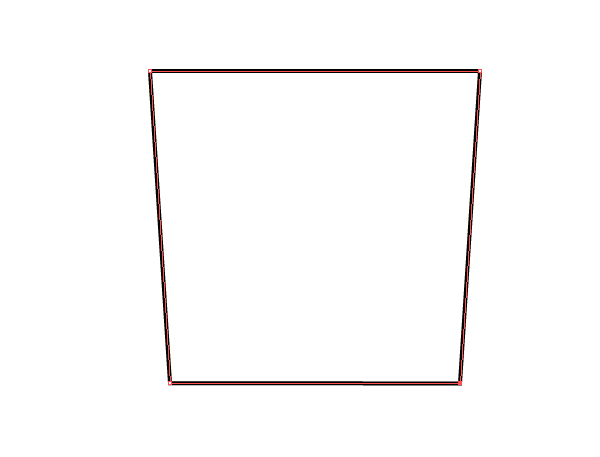
Step 1
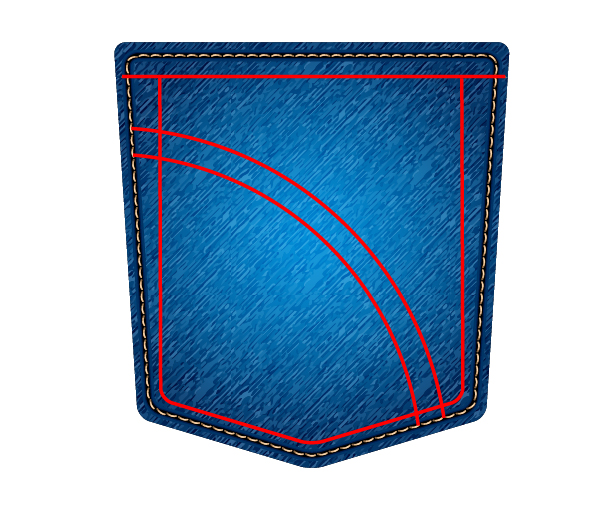
Start by creating a shape of a jeans back pocket. Take the Pen Tool (P) and create two horizontal straight lines at a certain distance from each other. The bottom line should be slightly shorter than the upper one. Select both lines and align them to the vertical, using the Align palette.

Step 2
Keeping the lines selected, join their points with the Pen Tool (P).
Using the same tool, create a new anchor point in the center of the bottom pocket. To find the center of the side quickly, turn on the Smart Guides mode (Command + U). Move this point straight down using the Direct Selection Tool (A), while holding down Shift.
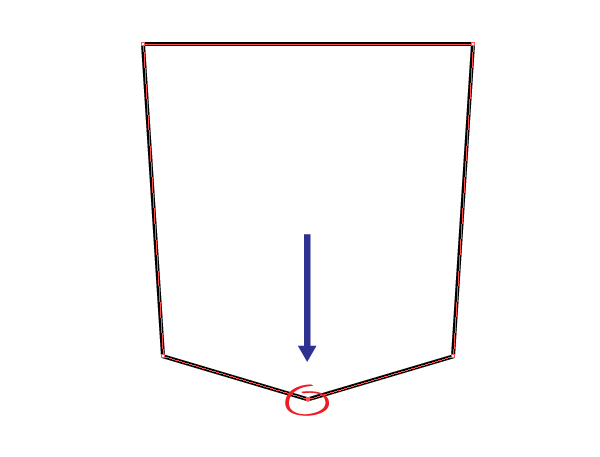
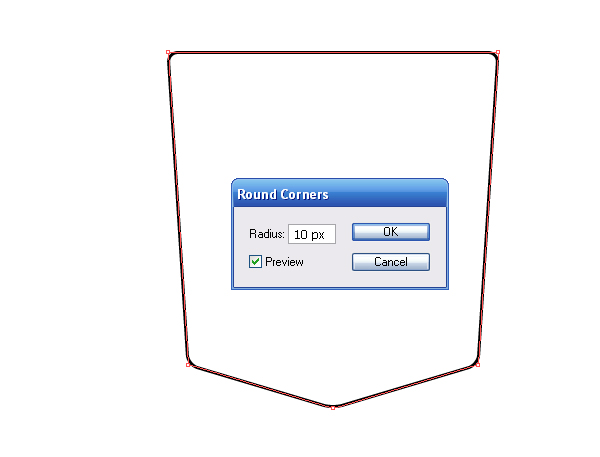
Step 3
Now go to Effect > Stylize > Round Corners… and set the corner radius in the dialog box.
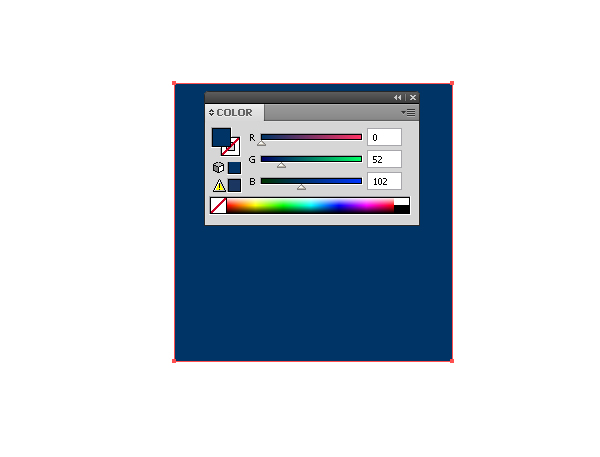
Step 4
Now let’s create the denim texture. Take the Rectangle Tool (M) and create a rectangle filled with blue.
Keep the rectangle selected, go to Effect > Texture > Texturizer and set the parameters indicated in the figure below.

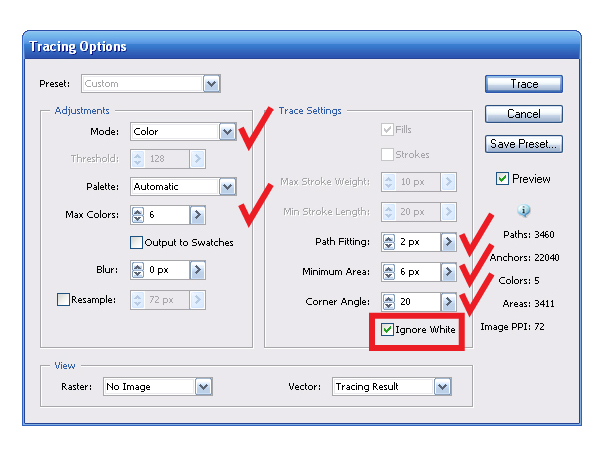
Step 5
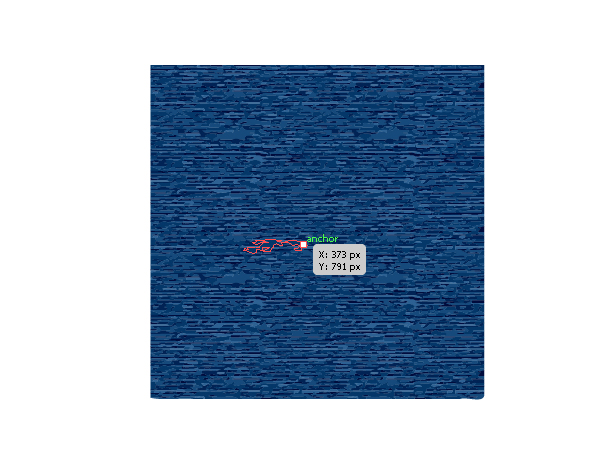
We have applied a raster effect to the rectangle. Now convert our texture into vector. Select the rectangle and go to Object > Expand Appearance, now to Object > Live Trace > Tracing Options… set the trace settings and click on the Trace button in the dialog box.
Go to Object > Expand, so we have got our denim texture.
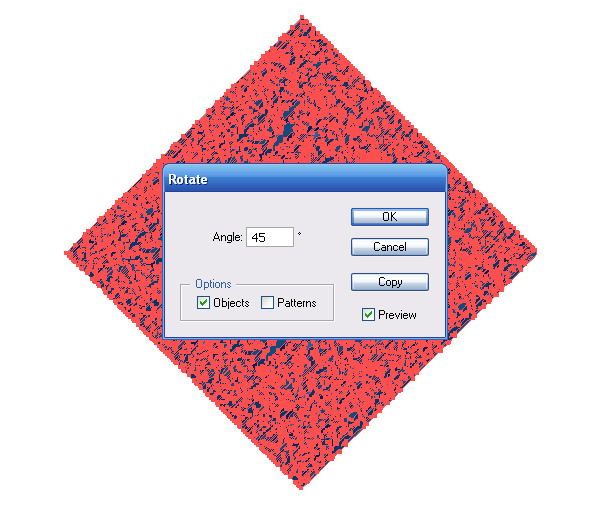
Step 6
Rotate the texture at 45 degrees. Select the texture and go to Object > Transform > Rotate… and set the rotation angle in the dialog box.
Take the Rectangle Tool (M) and create a square on the texture so that its edges did not go beyond the texture. Square should be with no fill and no stroke.
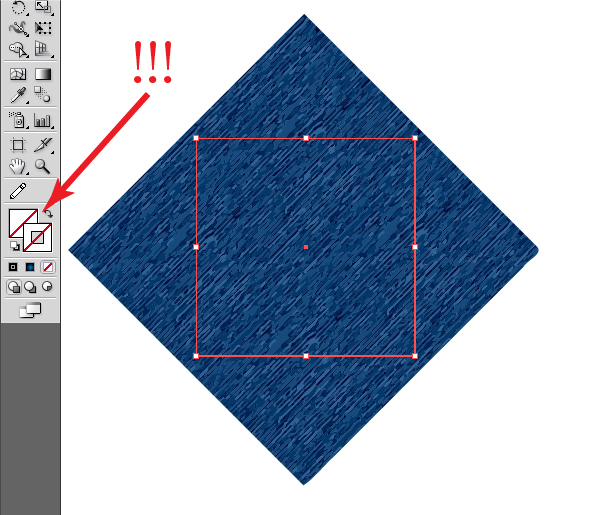
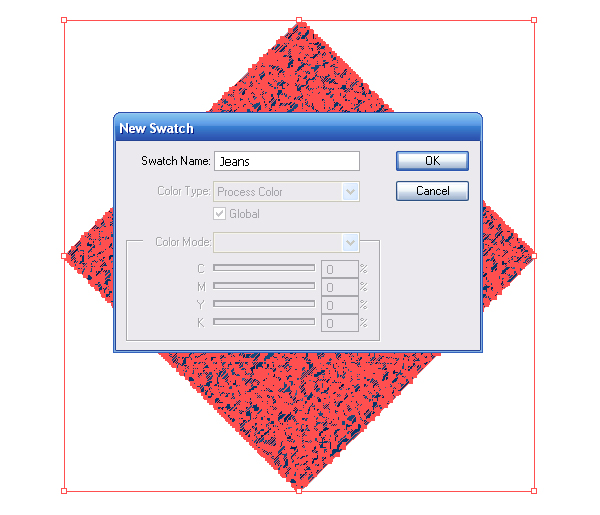
Move the square below the texture, it can be done by moving the under layer with it in the Layers palette or going to Object > Arrange > Backward (Command + [). Select the texture and the square, go to Edit > Define Pattern…, name the pattern and click on the OK button in the dialog box.
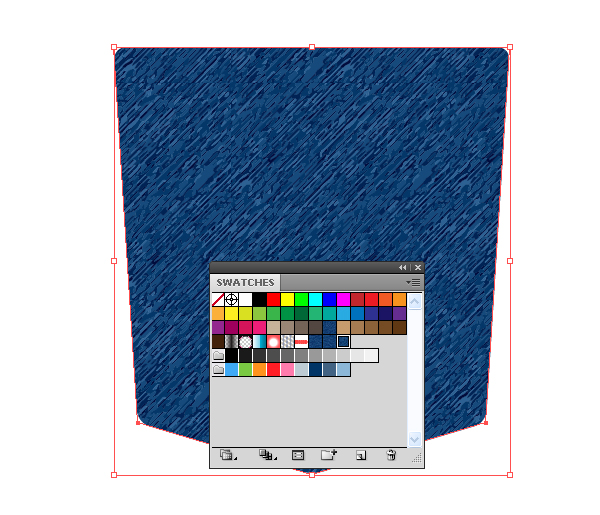
Now select the shape of the pocket and click on the pattern from the Swatches palette.
Step 7
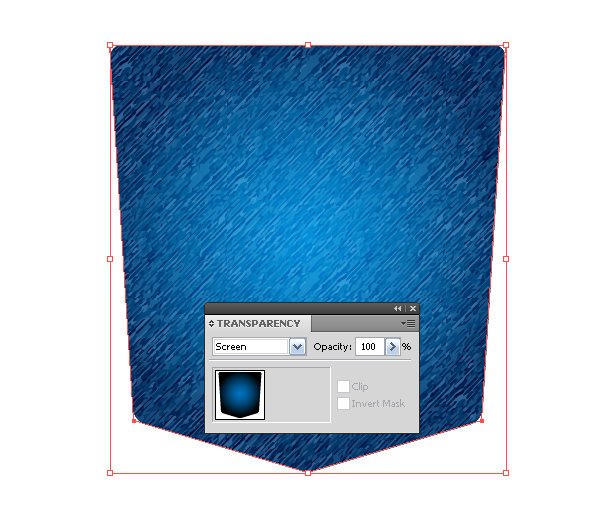
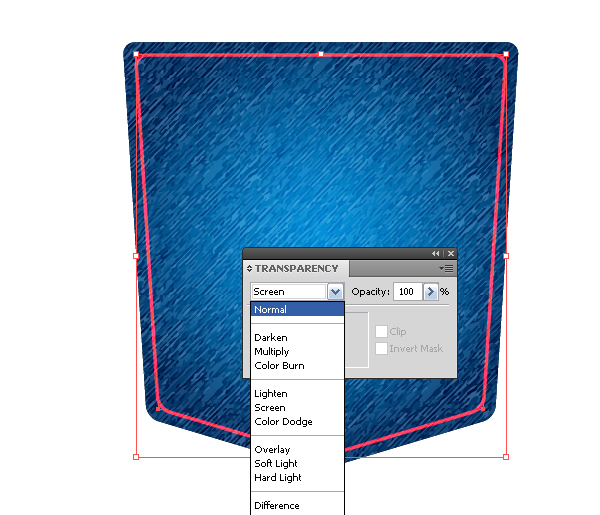
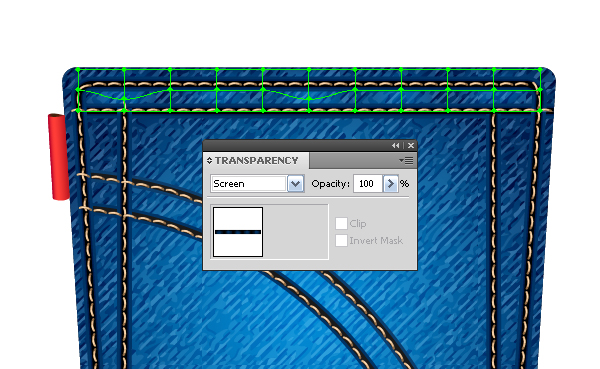
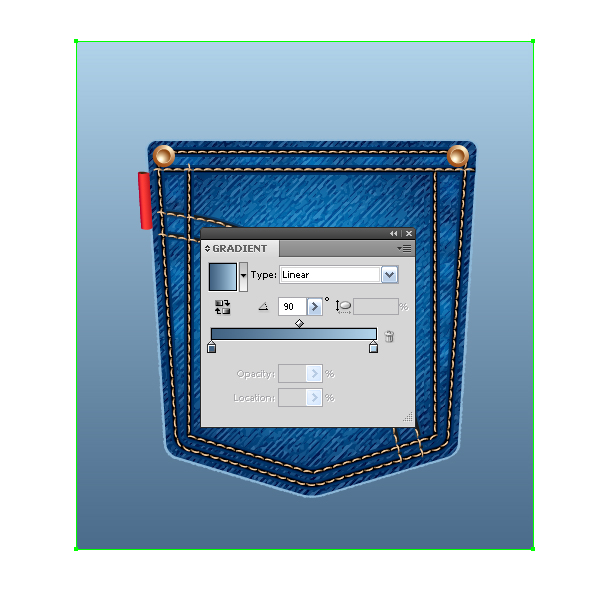
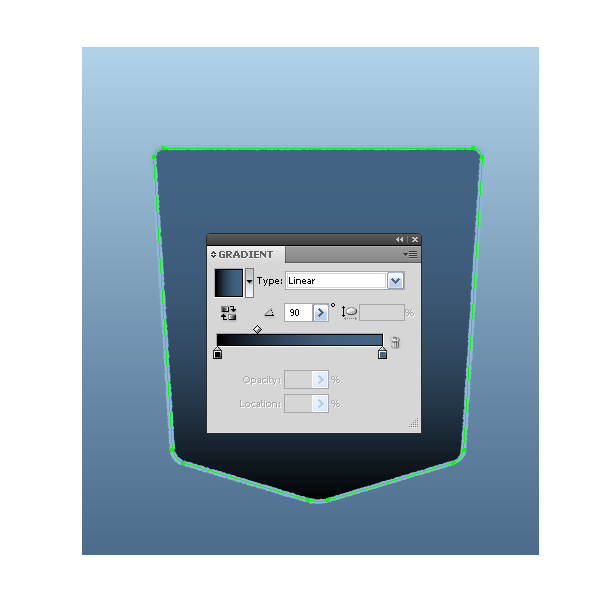
Copy and paste the shape of the pocket in front (Command + C, Command + F). Fill the pocket with radial a gradient that is colored from blue to black.
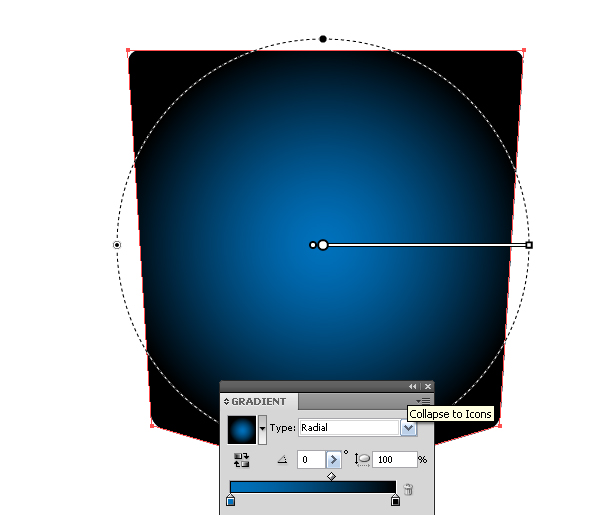
Now set Screen Blending Mode in the Transparency palette for this object.
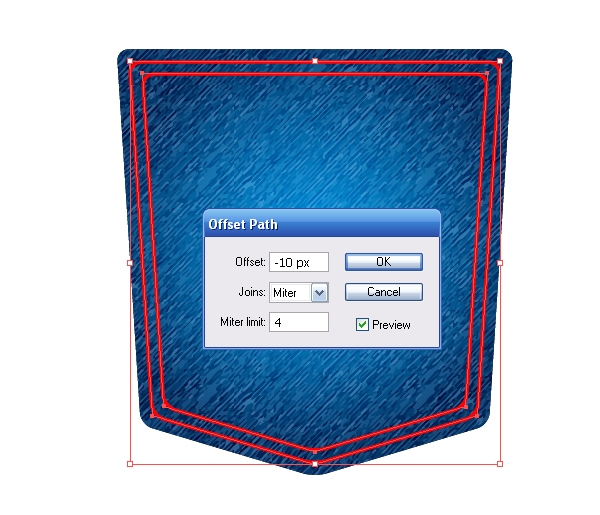
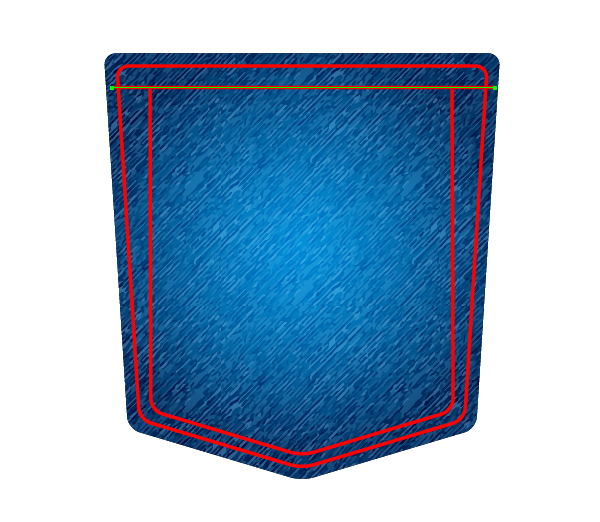
Step 8
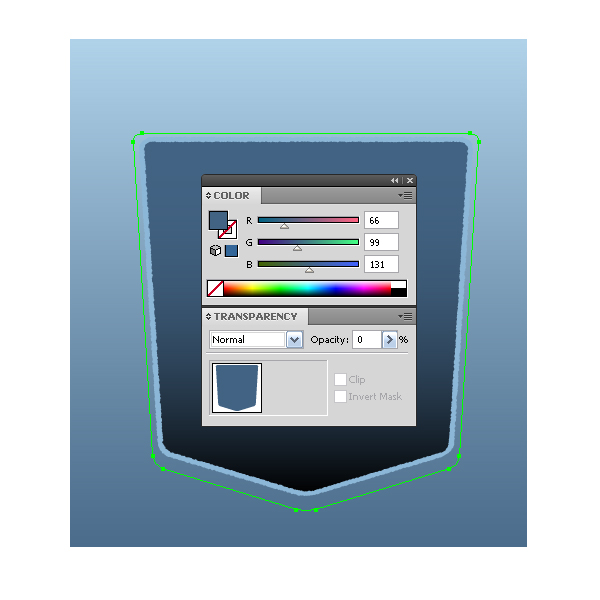
Select your pocket and go to Object > Path > Offset Path, and set -10px in the dialog box.
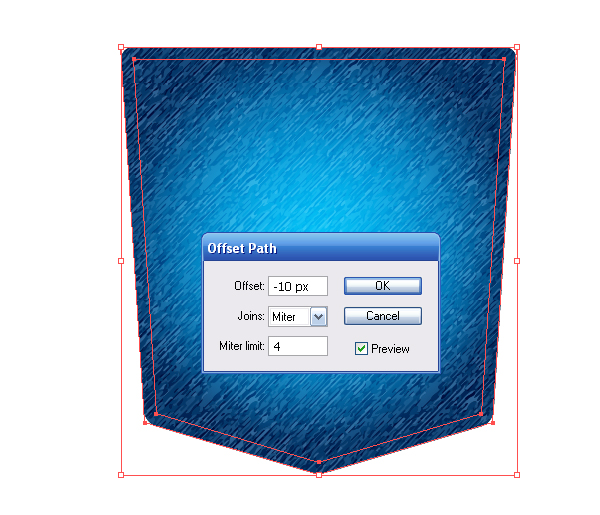
Turn off the fill and turn on the stroke of any color, so that the new object is visible on the background of the pocket.
The new object will be the basis for the stitching on the edge of the pocket. It has the same Blending Mode as the object with the gradient fill, so change this setting to Normal in the Transparency palette.
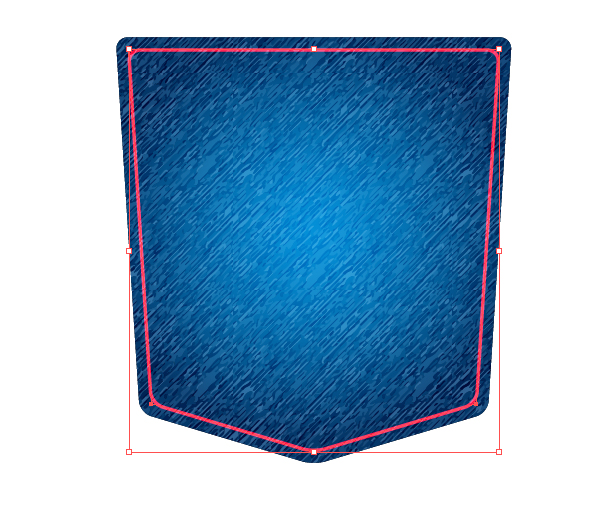
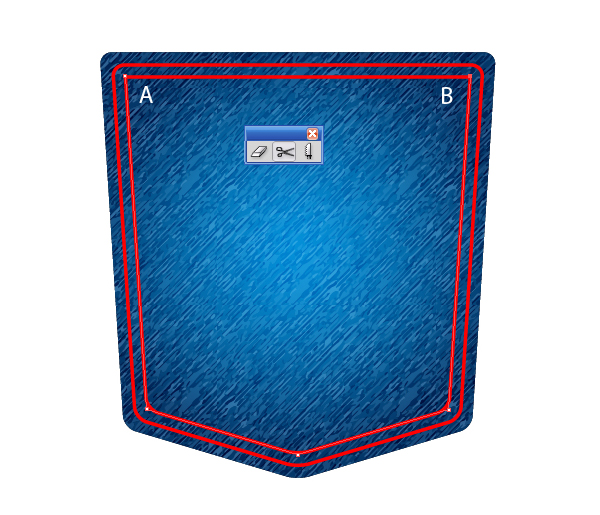
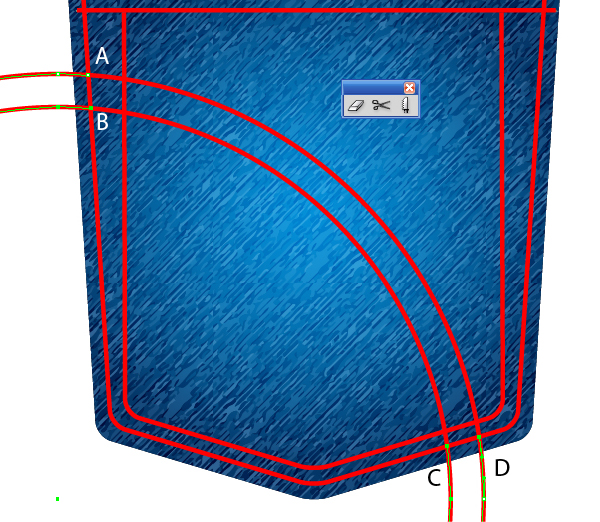
Step 9
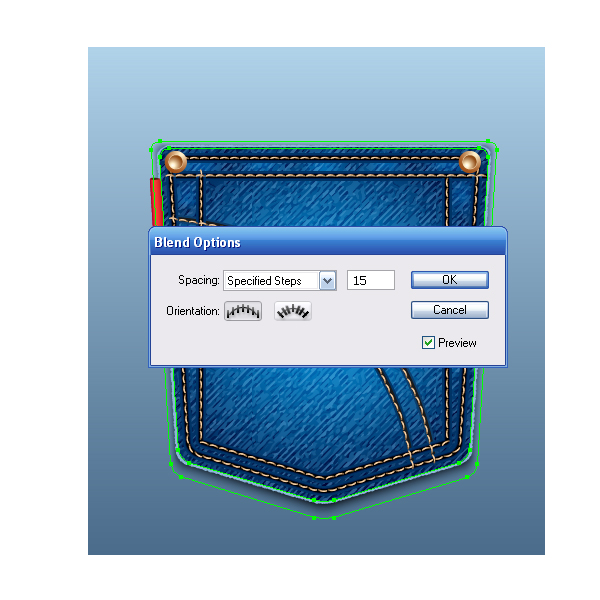
Create the shape of the second stitching, Object > Path > Offset Path, and set -10px in the dialog box.
Take the Scissors Tool (C) and cut this shape at points A and B.
Now remove the upper side of the stitching.
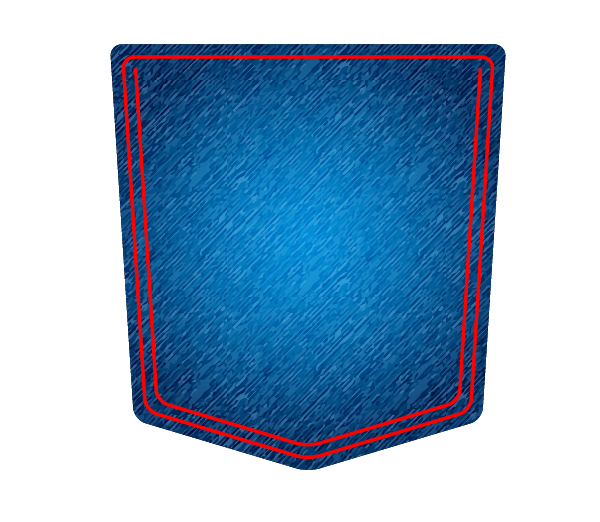
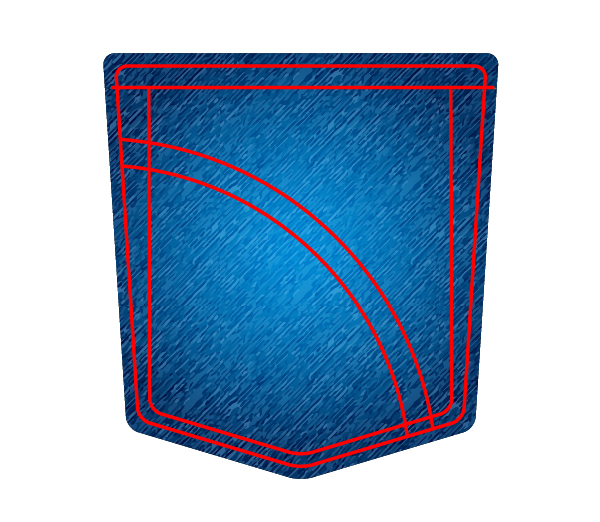
Using the Direct Selection Tool (A) bring the shape of the inner stitching to the view shown in the figure below.
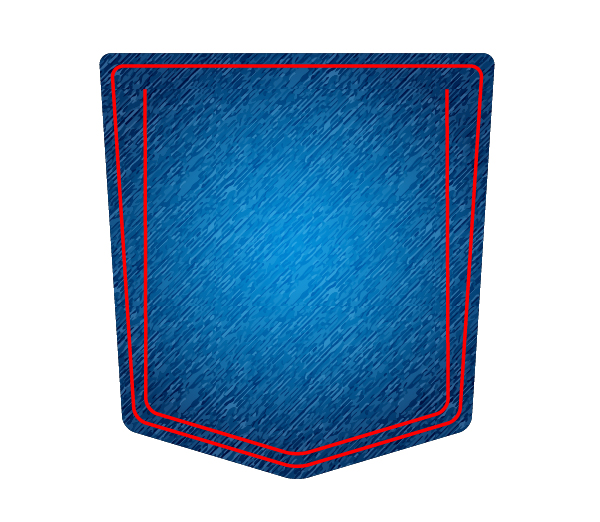
Take the Pen Tool (P) and create another inner stitching at the upper piece of the pocket.
Step 10
Take the Ellipse Tool (L) and create two circles, as shown in the figure below.
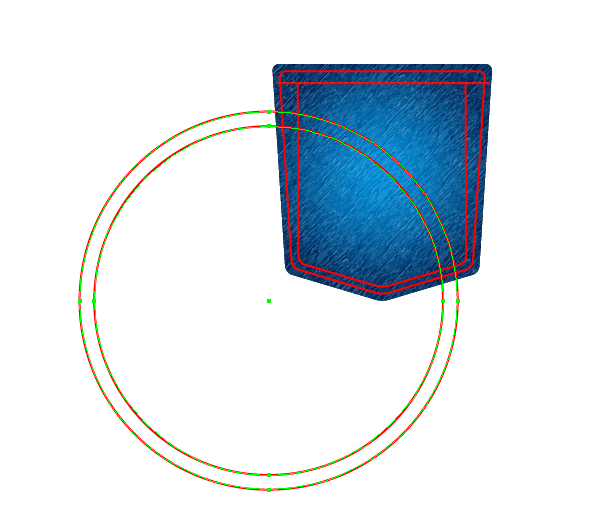
Now take the Scissors Tool (C) and cut the circle at points A, B, C and D.
Remove the pieces of circles that go beyond the pocket.
Step 11
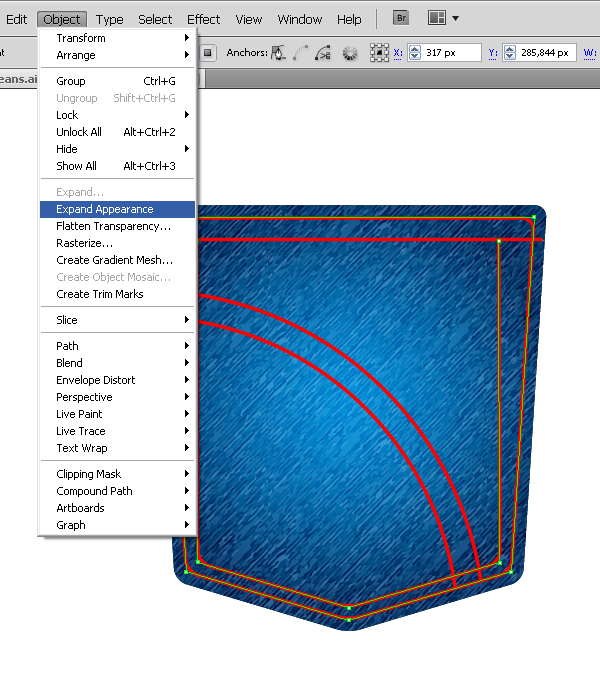
Continue working with the pocket stitching. Select two stitches with rounded corners, and go to Object > Expand Appearance.
Select the outer stitching and change the stroke color to dark blue 10 pt in width. Open the Appearance palette, the following steps will be done with it…
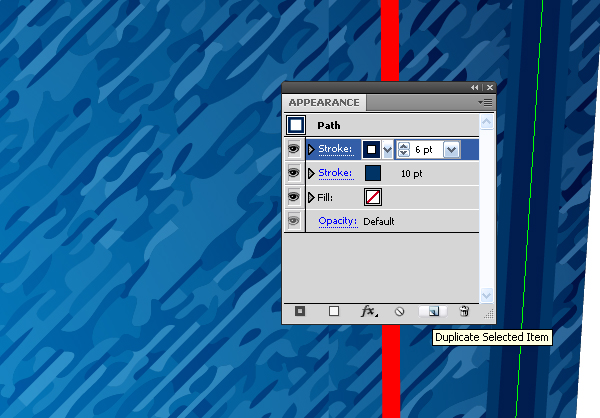
Step 12
Select the Stroke Panel in the Appearance palette, duplicate the stitching and change the stroke color to a darker blue color and set the stroke width equal to 6pt.
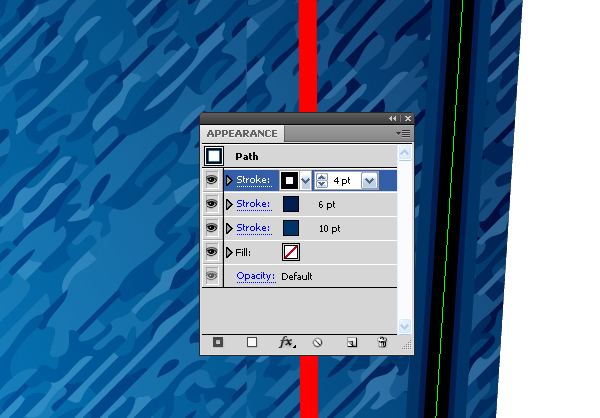
Using the same technique, create another stroke, this time in black color and 4pt in width.
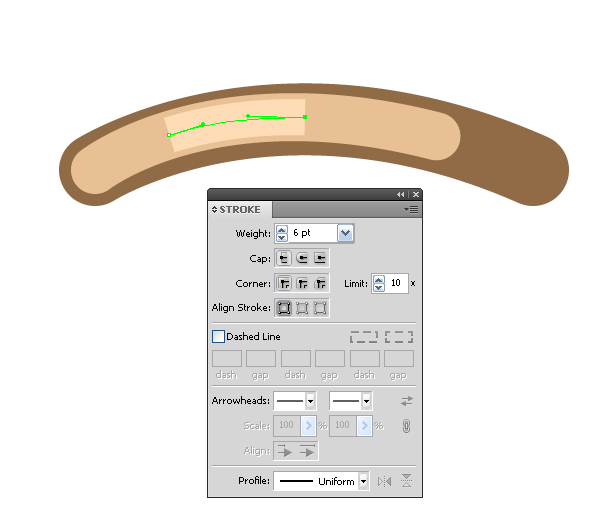
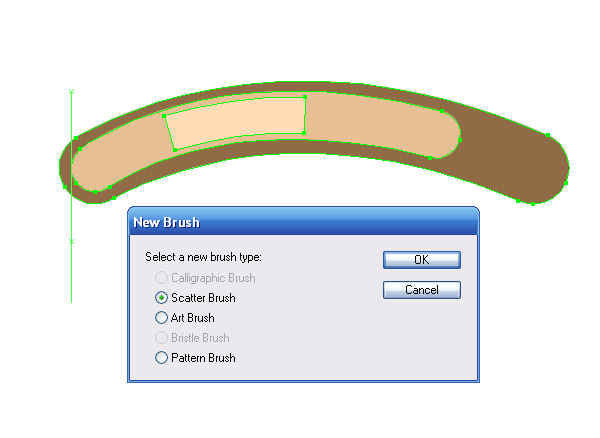
Step 13
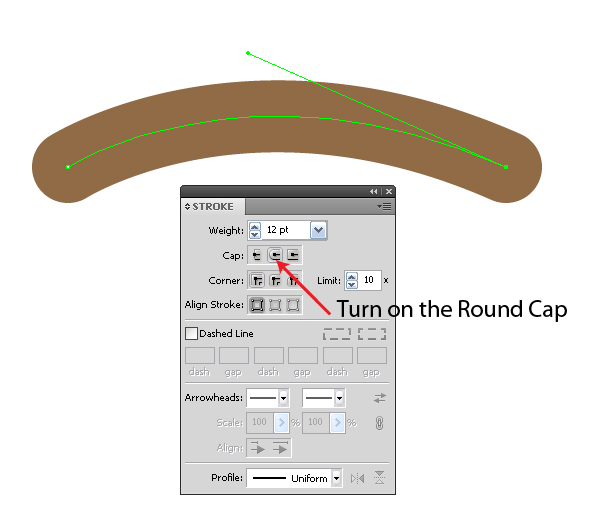
Now we need to create threads for the stitching. The Scatter Brush will work well for this step. Now create a brush element. Take the Pen Tool (P) and create an arc with a light brown, 12pt thick stroke. Turn on the Round Cap in the Stroke palette.
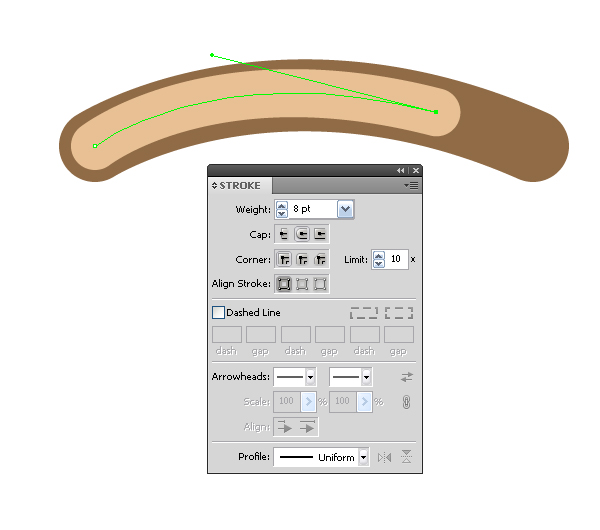
Create another arc with 8 pt thick stroke, and of a lighter shade of brown, as shown in the figure below.
And finally, create another little 6pt thick arc and of the lightest shade of brown.
All the objects create a play of light on the stitching thread. Select and group up all the elements (Command + G)
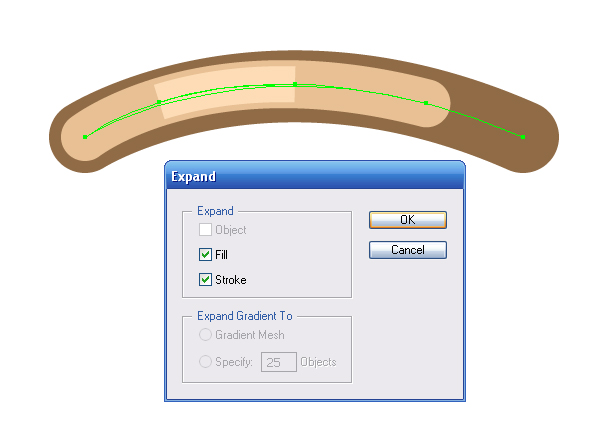
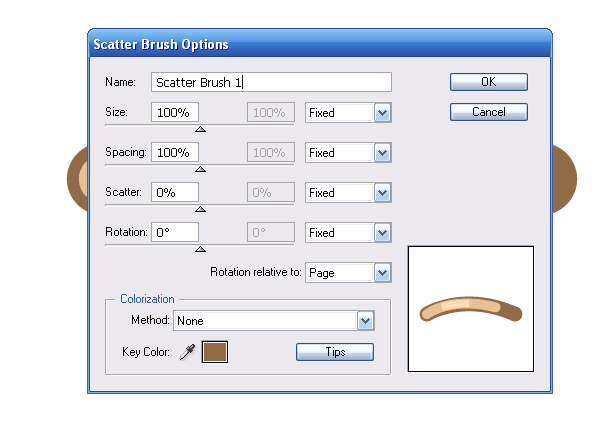
Step 14
Select the stitch thread and go to Object > Expand.
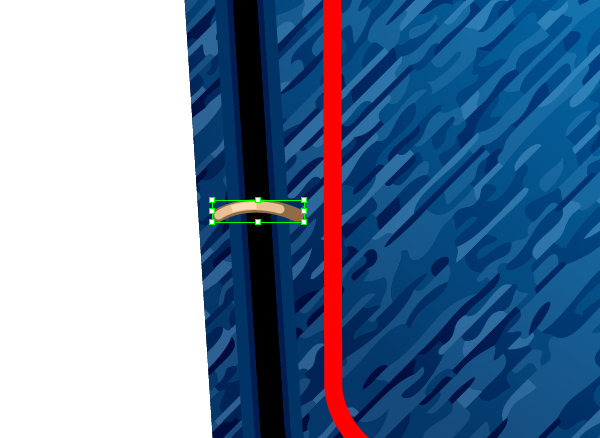
Reduce the stitch so that it was comparable with the elements of the stitching.
Now transfer the stitch to the Brushes palette.
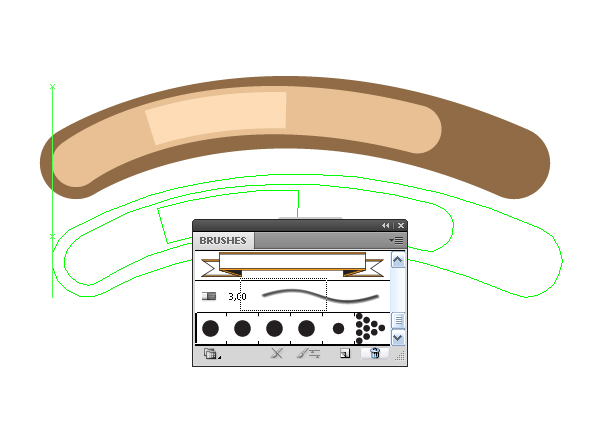
And save the new brush as the Scatter Brush.
Step 15
Select the outer pocket stitching, creating a new stroke in the Appearance palette and apply the created brush to it.
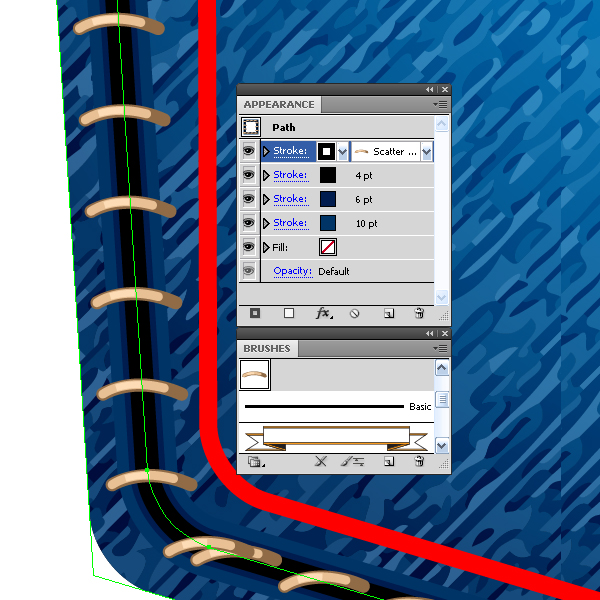
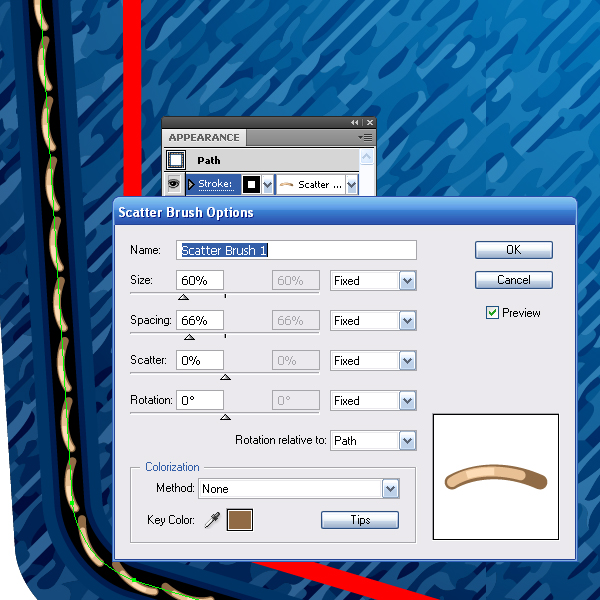
Well, we didn’t get what we wanted, hence the brush parameters need to be edited. Double click on the icon of the brush in the Brushes palette to open a dialog box with its parameters. Apply the adjustments shown in the picture below.
Step 16
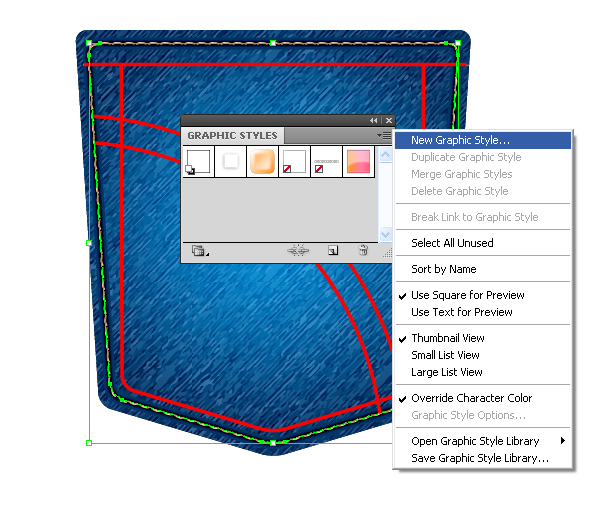
To speed up the work on the rest of the pocket stitching, create a new Graphic Style. Select the outer stitching of the pocket, open the Graphic Style palette and save the new style.
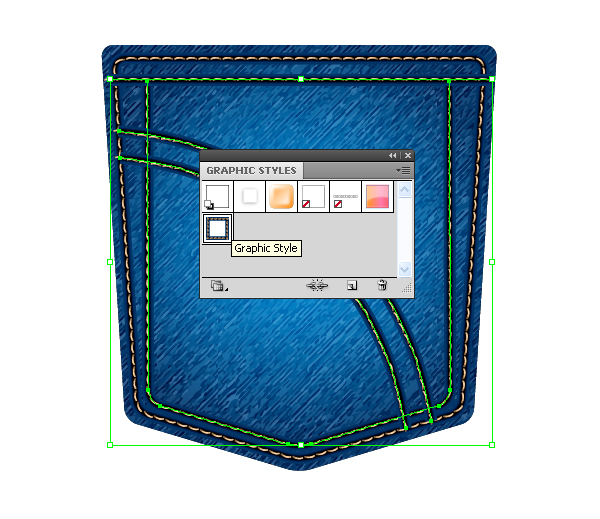
Now select the other stitches of the pocket and apply the created style to them.
Step 17
At the intersections of the stitching, we have the wrong overlapping of elements on each other.
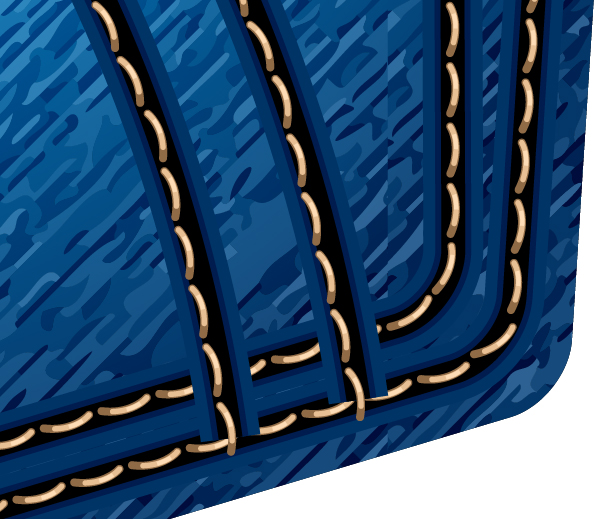
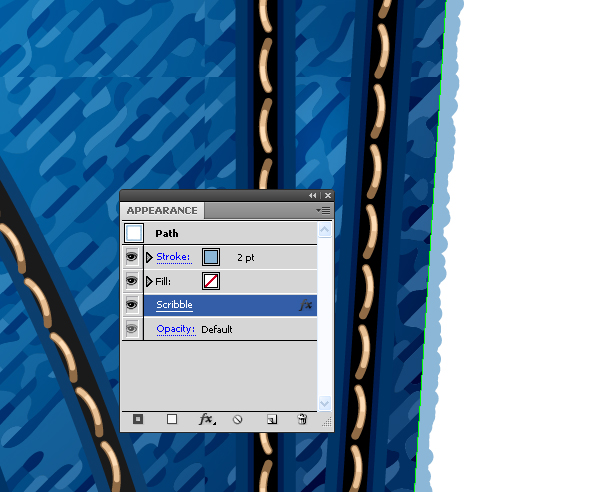
Let’s Fix it. Select the stitching and go to Object > Expand Appearance. After this operation, we received a group containing different elements that can be manipulated. Ungroup the stitching (Command + Shift + G).
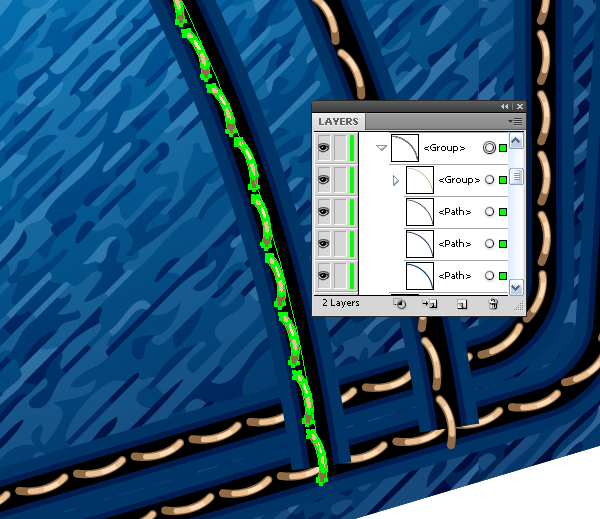
Now group up the lower elements of the stitching that represent black and blue arcs of different widths.
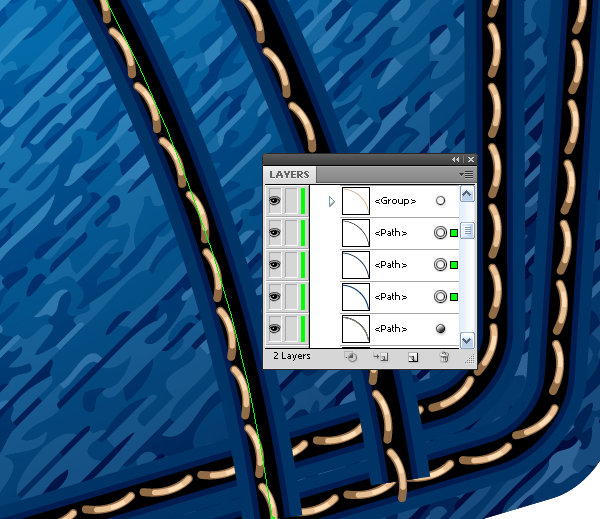
Move this group into the Layers palette so that it’s below the elements of stitching that it crosses.
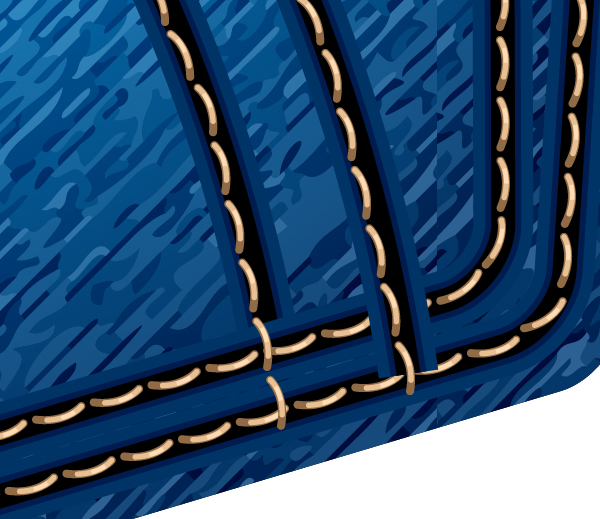
This technique can be applied at all points of intersection of lines.
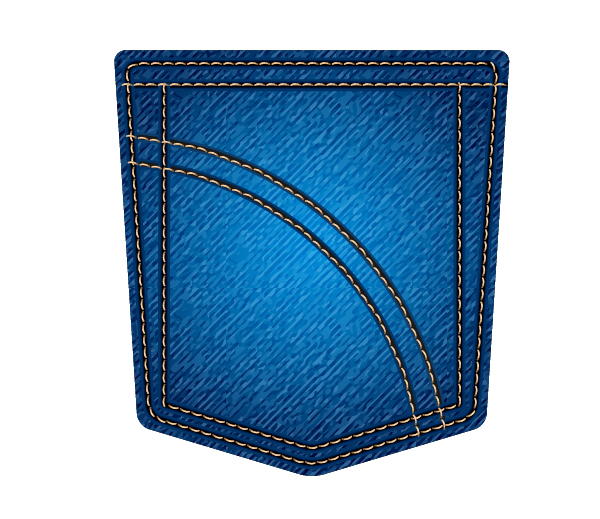
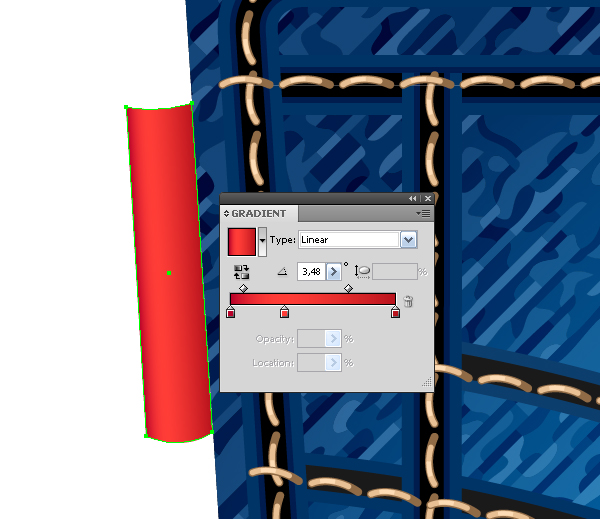
Step 18
Create a label on the pocket. Take the Pen Tool (P) and create the shape shown in the figure below. Fill the shape with a linear gradient consisting of shades of red.
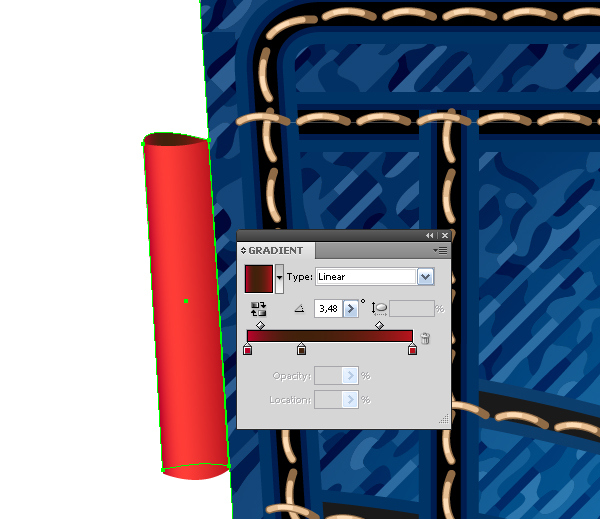
Using the same tool, create the back of the label, the gradient of this shape should reproduce the shadow on the inner surface of the fabric.
Step 19
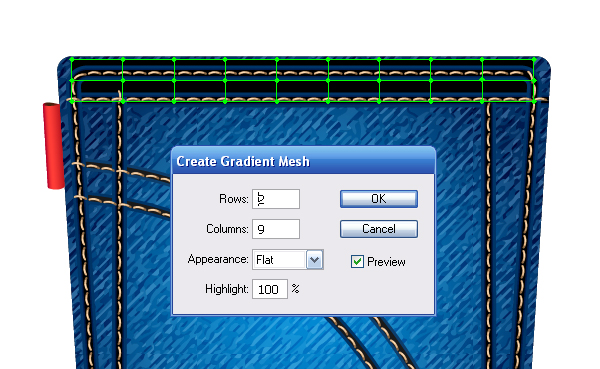
Now create scuffs between the stitching of the pocket. Take the Rectangle Tool (M) and create a rectangle filled with black. The rectangle should be placed under the stitching of the pocket in the Layers palette.

Keep the rectangle selected, go to Object > Create Gradient Mesh… and set the number of rows and columns in the dialog box.
You can slightly bend the center line of the gradient mesh, using the Direct Selection Tool (A), to make scuffs spotty. Select every other node that is on the center line of the mesh and replace its color with dark blue.
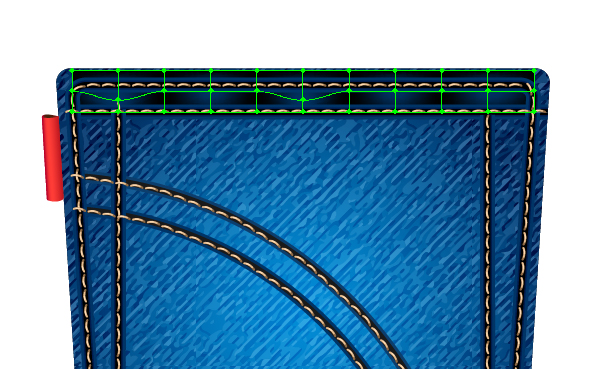
Select the entire mesh and set for it the Screen Blending Mode in the Transparency palette.
Step 20
Using this technique, create scuffs between the vertical stitches of the pocket.
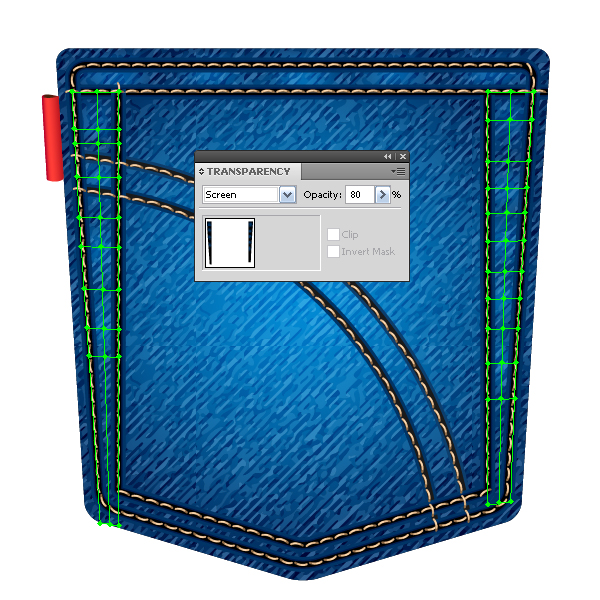
It is also convenient to use this technique to create folds on the fabric.
Step 21
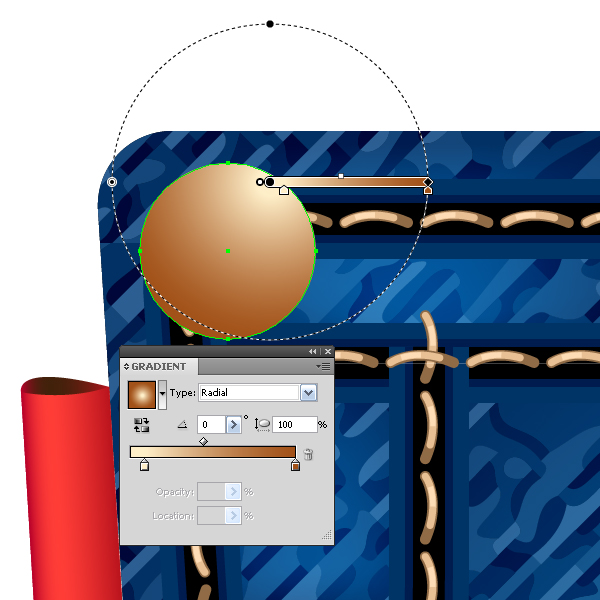
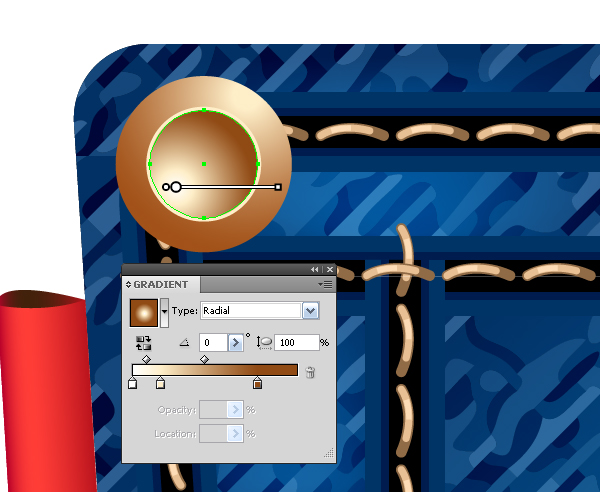
Now proceed to the rivets. Take the Ellipse Tool (L) and create a circle. Fill it with a radial gradient that goes from light yellow to brown.
Create another circle filled with a solid yellow.
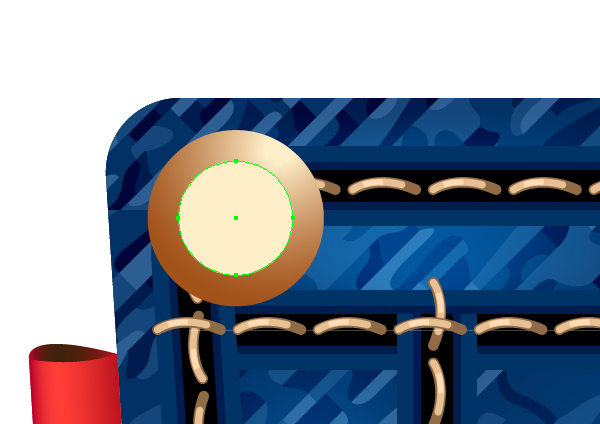
And finally, create another circle, which is also filled with a radial gradient, similar to the bottom circle.
Group up all the elements of rivets, duplicate and drag them to the right corner of the pocket.
Step 22
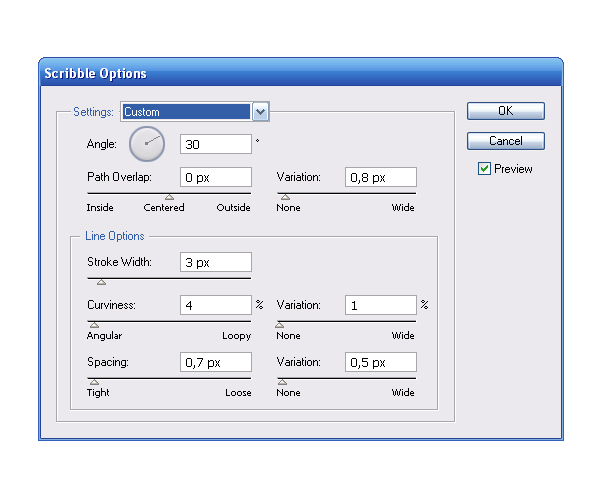
Create the fringe on the edges of the pocket. Copy the shape of the pocket and paste it back (Command + C, Command + B). Turn off the fill of this object and set the blue stroke to 2pt in width. Keep the object selected, go to Effect > Stylize > Scribble… and set the parameters indicated in the figure below.
Step 23
Create a background before creating the pocket’s shadow. Take the Rectangle Tool (M) and create a rectangle with a vertical linear gradient, then fill from blue to a light blue color.
Step 24
Now create a shadow from the pocket. Copy the shape of the pocket and paste it back (Command + C, Command + B). Fill it with a vertical linear gradient, that goes from black to blue (for better visibility on the figure below, I turned off the visibility of all elements of the pocket, except for the fringe).
Copy the created shape and paste it back. Increase its sizes by using the Selection Tool (V), while holding down Shift + Alt. Fill this shape with a solid blue color and set it to 0% Opacity in the Transparency palette.
Step 25
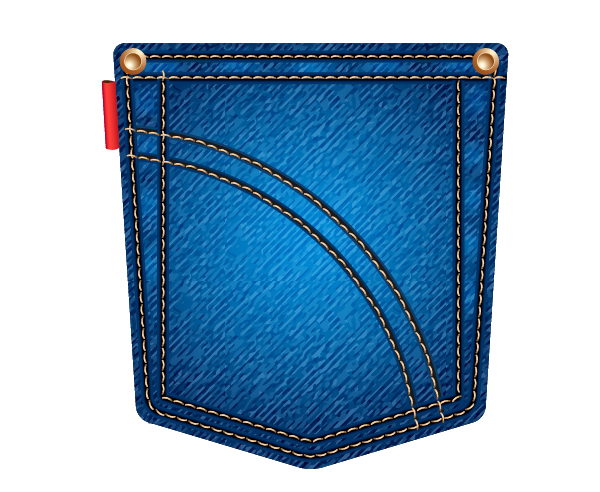
Select both shapes and go to Object > Blend > Make. The pocket is ready!
Tidak ada komentar:
Posting Komentar